Greetings fellow bird enthusiasts! Dismantling a bird feeder might seem like a daunting task, but fear not with the right guidance and a sprinkle of expertise, you’ll be able to disassemble and maintain your bird feeder like a seasoned pro.
| Takeaways |
|---|
| Dismantling a bird feeder is a manageable task when armed with the right tools and knowledge. |
| Regular cleaning and maintenance contribute to a healthy environment for birds and extend the life of your feeder. |
| Strategic placement and thoughtful upgrades enhance the bird-watching experience for both you and your feathered friends. |
| Expert tips ensure the durability of your bird feeder, making it a sustainable and long-lasting investment. |
| Eco-friendly disposal options for old components demonstrate a commitment to environmental responsibility. |
Tools and Materials Needed
Before we embark on this dismantling journey, let’s gather our tools and materials. Having the right equipment at your disposal ensures a smooth process.
| Tools | Materials |
| Screwdriver | Replacement Screws |
| Pliers | Cleaning Brushes |
| Wrench | Mild Detergent |
| Gloves | Lubricating Oil |
Choosing quality tools and materials sets the stage for a hassle-free dismantling experience. Now, let’s dive into the intricacies of picking the perfect location for your bird feeder.
Tired of pet hair troubles? Learn effective solutions for Samsung’s Jet 60 Pet Vacuum. Keep your home clean and your pets happy with expert tips on hair tangle issues.
Choosing the Right Location
The success of dismantling begins with selecting the optimal spot for your bird feeder. Different locations offer varying advantages, and it’s essential to find the one that suits both you and your feathered friends.
| Location | Pros | Cons |
| Backyard | Easy Monitoring | Prone to Squirrel Intrusion |
| Balcony/Patio | Close Observation of Birds | Limited Space for Larger Feeders |
| Garden | Natural Ambiance | Exposure to Harsh Weather |
Understanding your surroundings ensures a harmonious coexistence between you, the birds, and your bird feeder. Next, let’s explore the diverse types of bird feeders available.
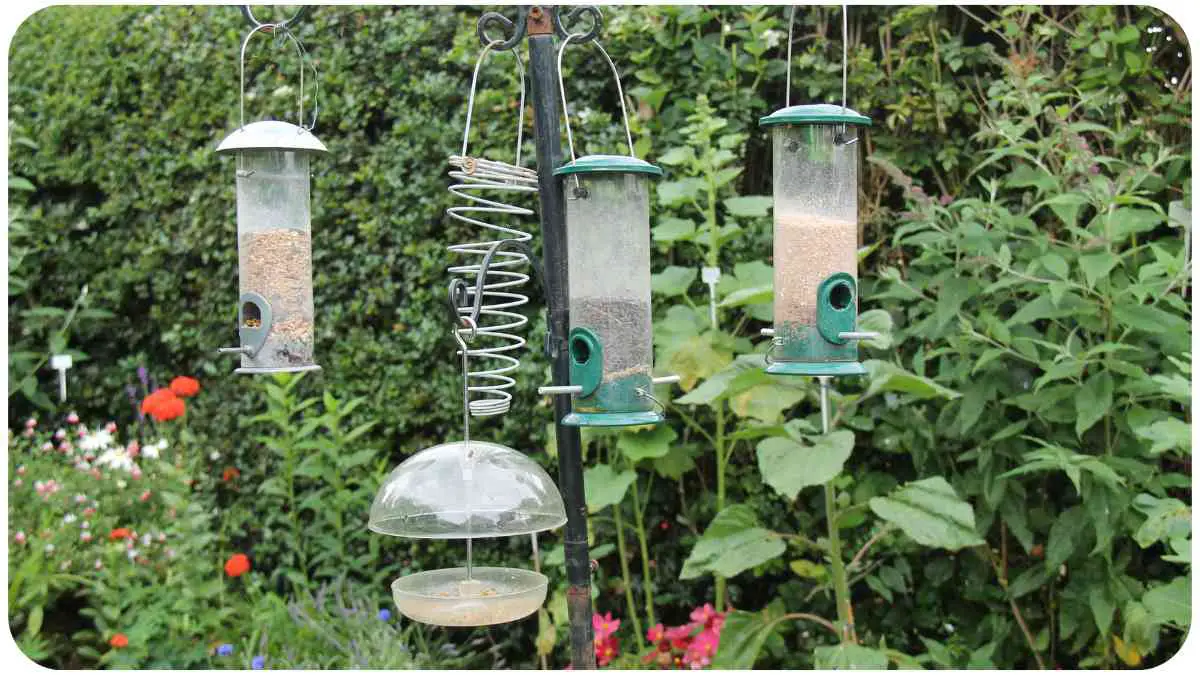
Understanding Bird Feeder Types
Bird feeders come in various shapes and sizes, each catering to different bird species. Knowing your feeder type is crucial for effective dismantling and maintenance.
| Feeder Type | Features |
| Hopper | Large Seed Capacity, Attracts Many Species |
| Platform | Suitable for Ground-Feeding Birds |
| Tube | Protects Seeds from Weather, Squirrel-Proof |
| Suet | High-Energy Food for Cold Seasons |
Now that we’ve laid the groundwork let’s explore the step-by-step dismantling process.
Safety Precautions
Before we dive into the nitty-gritty of dismantling, let’s prioritize safety. Ensure you wear gloves to protect your hands and follow these essential precautions:
- Switch Off Power: If your bird feeder has any electronic components, turn off the power to avoid accidents.
- Check for Wildlife: Look for any hidden residents, like wasps or bees, before starting the dismantling process.
With safety in mind, let’s move on to the heart of the matter – dismantling your bird feeder.
Make life easier for your feline friend. Unlock the secrets to setting up your Sure Petcare Microchip Cat Flap with our insightful tips and tricks.
Step-by-Step Guide to Dismantling
Follow this comprehensive guide for a seamless dismantling process. Refer to the table below for a breakdown of each step.
| Step | Description |
| Disassembling the Roof | Remove any screws or latches securing the roof. |
| Removing Perches and Trays | Detach perches and trays carefully to avoid damage. |
| Detaching the Main Frame | Unscrew or unhook the main frame from the support. |
Disassembling the Roof
The roof is like the protective cap of your bird feeder, shielding the seeds and birds from the elements. To dismantle it:
- Locate Fasteners: Identify the screws or latches securing the roof to the main structure.
- Use the Right Tool: Employ your trusty screwdriver or appropriate tool to loosen and remove these fasteners.
- Handle with Care: As you detach the roof, be mindful of any hinges or delicate parts. Gently lift it away, ensuring not to damage any components.
- Inspect for Damage: While the roof is off, take a moment to inspect it for any wear or damage. This is the perfect time to note if any repairs or replacements are needed.
With the roof out of the way, our next focus is on the perches and trays.
Removing Perches and Trays
Perches and trays are where our feathered friends rest and dine. Let’s dismantle these components methodically:
- Identify Attachment Points: Locate the points where perches and trays are attached to the main structure.
- Unfasten Securely: Using your pliers or screwdriver, carefully unfasten any screws, bolts, or clips holding the perches and trays in place.
- Handle Delicately: Birds can be particular about their perching spots. Handle these components with care to preserve their integrity.
- Clean as You Go: Take this opportunity to wipe down perches and trays, removing any accumulated debris.
Now that perches and trays are set aside, it’s time to move on to the main frame.
Ensure your pet’s safety with a working PetSafe Wireless Fence. Navigate through challenges effortlessly with our comprehensive guide on effective solutions.
Detaching the Main Frame
The main frame is the backbone of your bird feeder, providing structural support. To dismantle it:
- Locate Attachment Points: Similar to previous steps, identify where the main frame connects to supporting structures.
- Use Appropriate Tools: Employ the appropriate tools – whether a wrench or screwdriver – to loosen and remove any securing elements.
- Team Effort: Some larger feeders may require an extra set of hands. Don’t hesitate to enlist a helper if needed.
- Inspect for Wear: As the main frame comes off, give it a once-over. Look for signs of wear, rust, or any issues that might require attention.
Congratulations! You’ve successfully dismantled your bird feeder. Now, let’s move on to the crucial aspect of cleaning and maintenance.
Cleaning and Maintenance Tips
Dismantling your bird feeder is just the beginning; maintaining its cleanliness ensures a welcoming environment for our feathered friends. Let’s explore some essential tips and tricks to keep your bird feeder in top-notch condition.
Recommended Cleaning Products
Cleaning your bird feeder is a simple yet crucial step in ensuring the health and happiness of visiting birds. Here’s a table listing recommended cleaning products:
| Product | Purpose |
| Mild Detergent | Gentle on materials, effective cleaner |
| Cleaning Brushes | Reach nooks and crannies for thorough cleaning |
| Lubricating Oil | Prevent rusting of metal components |
Regular cleaning not only prevents the spread of disease among birds but also maintains the aesthetic appeal of your feeder.
Troubleshooting Common Issues
No journey is without its bumps, and the same goes for bird feeder maintenance. Let’s address common issues that may arise and how to troubleshoot them effectively.
Enhance your pet’s dining experience with smart feeders. Discover top issues and solutions to make feeding time a breeze for both you and your furry friend.
Troubleshooting Guide
| Issue | Possible Cause | Solution |
| Mold Growth | Residual moisture and seed debris | Clean feeder thoroughly; allow to dry completely |
| Clogging of Seed Ports | Accumulation of wet seeds or debris | Use cleaning brushes to clear ports; ensure seeds are dry before refilling |
| Squirrel Interference | Clever squirrels finding a way to access seeds | Invest in squirrel-proof accessories; relocate feeder if necessary |
| Rust on Metal Parts | Exposure to the elements and moisture | Apply lubricating oil to metal parts; consider weatherproofing measures |
By being proactive in troubleshooting, you can maintain a healthy and functional bird feeder ecosystem.
Storing and Reassembling
Now that your bird feeder is gleaming from a thorough cleaning, let’s discuss proper storage and reassembly techniques.
Storage Tips for Bird Feeder Components
| Component | Storage Tip |
| Roof | Store in a dry, cool place to prevent warping or damage |
| Perches and Trays | Keep in a secure box to prevent misplacement or breakage |
| Main Frame | Store in a well-ventilated area, ensuring no moisture buildup |
Proper storage not only prolongs the life of your components but also makes reassembly a breeze when the next bird-feeding season arrives.
Enjoy the precious moments when your dog falls asleep on you. Explore heartwarming ideas on what to do to make the experience delightful for both you and your beloved canine companion.
Upgrading Your Bird Feeder
As a seasoned bird feeder enthusiast, you might be interested in enhancing your setup. Let’s explore popular upgrades and accessories to elevate your bird-watching experience.
Popular Upgrades and Accessories
| Upgrade | Benefit |
| Weather Guard | Shields seeds from rain and snow |
| Baffle | Deters squirrels from reaching seeds |
| Seed Trays | Catches fallen seeds, reducing waste |
| Perch Guards | Discourages larger birds from dominating the feeder |
Choosing the right upgrades can attract a wider variety of birds while keeping unwanted guests at bay.
Expert Tips for Longevity
Maintaining a bird feeder isn’t just a hobby; it’s a commitment to the well-being of our feathered friends. Let’s explore some expert tips that go beyond the basics, ensuring the longevity of your bird feeder.
Expert Tips for Bird Feeder Durability
| Tip | Description |
| Regular Inspections | Conduct weekly inspections for wear, loose parts, and signs of damage |
| Seasonal Overhauls | Perform a comprehensive overhaul at the end of each bird-feeding season |
| Rotate Feeder Locations | Prevent wear on one side by periodically changing the feeder’s location |
| Use Quality Materials for Repairs | When making repairs, opt for high-quality, bird-safe materials |
By incorporating these expert tips into your routine, you’ll not only extend the life of your bird feeder but also create a thriving habitat for local bird species.
Personal Anecdotes
Allow me to share a personal experience that underscores the importance of regular maintenance. One summer, I noticed a decline in bird activity around my feeder. Upon inspection, I discovered a clogged seed port. A quick clean and a bit of troubleshooting brought the birds back in no time. Remember, a well-maintained feeder is a magnet for avian visitors!
Frequently Asked Questions
Let’s address some common queries that bird enthusiasts often have regarding dismantling and maintaining their feeders.
FAQ Compilation
| Question | Answer |
| How often should I clean my bird feeder? | Ideally, clean your feeder every two weeks, or more frequently if you notice any issues like mold or seed clogs. |
| Can I use any detergent for cleaning? | Stick to mild, unscented detergents to ensure the safety of the birds. Rinse thoroughly to remove any residue. |
| What do I do if my feeder attracts unwanted guests? | Consider using baffles, relocating the feeder, or investing in squirrel-proof accessories to deter unwanted visitors. |
| Is it necessary to dismantle the feeder for cleaning? | Dismantling allows for a more thorough cleaning, reaching hidden areas that might be missed otherwise. |
Feel free to ask any other questions you may have, and I’ll be happy to provide guidance based on my experiences in the bird-watching realm.
Eco-Friendly Disposal Options
As responsible stewards of the environment, it’s crucial to consider eco-friendly disposal options for your bird feeder components when they reach the end of their lifespan. Let’s explore sustainable ways to bid farewell to your old feeder.
Environmentally Friendly Disposal Methods
| Component | Disposal Method |
| Roof, Perches, and Trays | Repurpose for DIY projects or recycle at local facilities |
| Main Frame | Check for metal recycling programs in your area |
| Plastic Parts | Dispose of in designated recycling bins |
| Wooden Parts | Compost if untreated, otherwise, check local waste disposal guidelines |
By opting for eco-friendly disposal methods, you contribute to the overall health of the environment while making space for a new and improved bird feeder.
Conclusion
Congratulations! You’ve journeyed through the art of dismantling, cleaning, maintaining, and even upgrading your bird feeder. Remember, the key to a successful bird-watching experience lies in the details from the right tools to a meticulous cleaning routine and thoughtful disposal practices.
As you embark on this avian adventure, let your passion for bird feeders be a reflection of your commitment to the well-being of our feathered friends. May your bird feeder continue to be a hub of activity, bringing joy and nature’s melody to your doorstep.
If you have any more questions or insights to share, feel free to reach out. Happy bird watching!
Further Reading
Here are some additional resources to deepen your understanding of dismantling and cleaning bird feeders:
- Bird Feeders You Can Take Apart and Clean: Explore discussions and recommendations from fellow gardening enthusiasts on dismantling bird feeders for effective cleaning.
Short Description: Join a community of gardeners sharing insights on bird feeders that are easy to disassemble, providing practical tips for hassle-free maintenance. - How to Disassemble and Clean Your Roamwild PestOff Bird Feeder: Dive into a detailed guide on dismantling and cleaning the Roamwild PestOff Bird Feeder, offering specialized insights for this particular feeder.
Short Description: Learn the specific steps and considerations for disassembling and cleaning the Roamwild PestOff Bird Feeder, ensuring optimal performance. - How to Clean a Bird Feeder: True Value provides a comprehensive DIY guide on cleaning bird feeders, emphasizing the importance of regular maintenance for a healthy bird-friendly environment.
Short Description: Discover practical advice and step-by-step instructions from True Value to effectively clean various types of bird feeders, enhancing the longevity of your feathered friends’ feeding station.
FAQs
How often should I clean my bird feeder?
Regular cleaning every two weeks is recommended, or more frequently if issues like mold or seed clogs are noticed. Maintaining a clean feeder promotes bird health and ensures an inviting environment.
Can I use any detergent for cleaning?
Stick to mild, unscented detergents to ensure bird safety. Thoroughly rinse the feeder to remove any detergent residue before refilling it.
What do I do if my feeder attracts unwanted guests?
Consider using baffles, relocating the feeder, or investing in squirrel-proof accessories to deter unwanted visitors and maintain a peaceful bird-watching experience.
Is it necessary to dismantle the feeder for cleaning?
Dismantling allows for a more thorough cleaning, reaching hidden areas that might be missed during a surface clean. It ensures a hygienic environment for birds and prevents potential issues.
How can I repurpose old bird feeder components?
Old components like roofs, perches, and trays can be repurposed for DIY projects or recycled at local facilities. Check with local recycling programs for specific guidelines.

I am Dr Hellen James a veterinarian, pet lover, and writer. I have many years of experience caring for pets, including dogs, cats, birds, and fish (and even axolotls!). I love spending time with the animals in my life, especially when they are sick or need love.